Multi-cloud DNS delegation between GCP and AWS
Overview
The use case is hosting services in one cloud provider while having the DNS domain for those services managed on a different cloud provider.
This technique is useful when you group system resources in a hybrid multi-cloud environment under the same DNS domain.
For the example in this article, we already have a DNS domain hosted using AWS DNS (Route 53) on AWS, and needed to place a set of OpenShift Container Platform (OCP) clusters in GCP while using a sub-domain of that original DNS domain.
This diagram illustrates the desired outcome on both DNS zones, with AWS Route 53 handling the initial requests for names in the primary domain and deferring the queries for the sub-domain to the DNS resolvers in GCP.
 |
|---|
| Component diagram of the solution in this article. |
There are two underlying assumptions for this type of solution:
- The cluster administrator has considered the implications of making the DNS names of the new cluster publicly available. Note that this is unrelated to whether the cluster endpoints are accessible publicly.
- The cluster administrator is responsible for ensuring clients have a proper network path to the network hosting the endpoints. For instance, if the new OCP cluster is created on a private subnet, clients outside that subnet may be able to resolve the DNS name for the cluster’s console or API server. Still, they will not be able to establish a network connection to those endpoints.
DNS record types
It may be helpful, although not strictly necessary, to understand a bit more about DNS record types as you follow along this tutorial.
For this tutorial, these are the most relevant record types:
- NS: Delegates a DNS zone to use the given authoritative name servers.
- A: Returns a 32-bit IPv4 address, most commonly used to map hostnames to an IP address of the host, but it is also used for DNSBLs, storing subnet masks in RFC 1101, etc.
- SOA: Specifies authoritative information about a DNS zone, including the primary name server, the email of the domain administrator, the domain serial number, and several timers relating to refreshing the zone.
Create the DNS Zone in GCP
The first step is to create a non-authoritative DNS Zone in GCP, using a sub-domain of the hosted domain in Route 53.
The hosted domain in Route 53 is “cloudpak-bringup.com,” whereas the sub-domain will be “gcp.cloudpak-bringup.com”
- Click on the “Create Zone” button.
- Use
cloud-pak-bring up-labas the zone name. - Use
gcp.cloudpak-bringup.comas the DNS name. - Click the “Create” button.
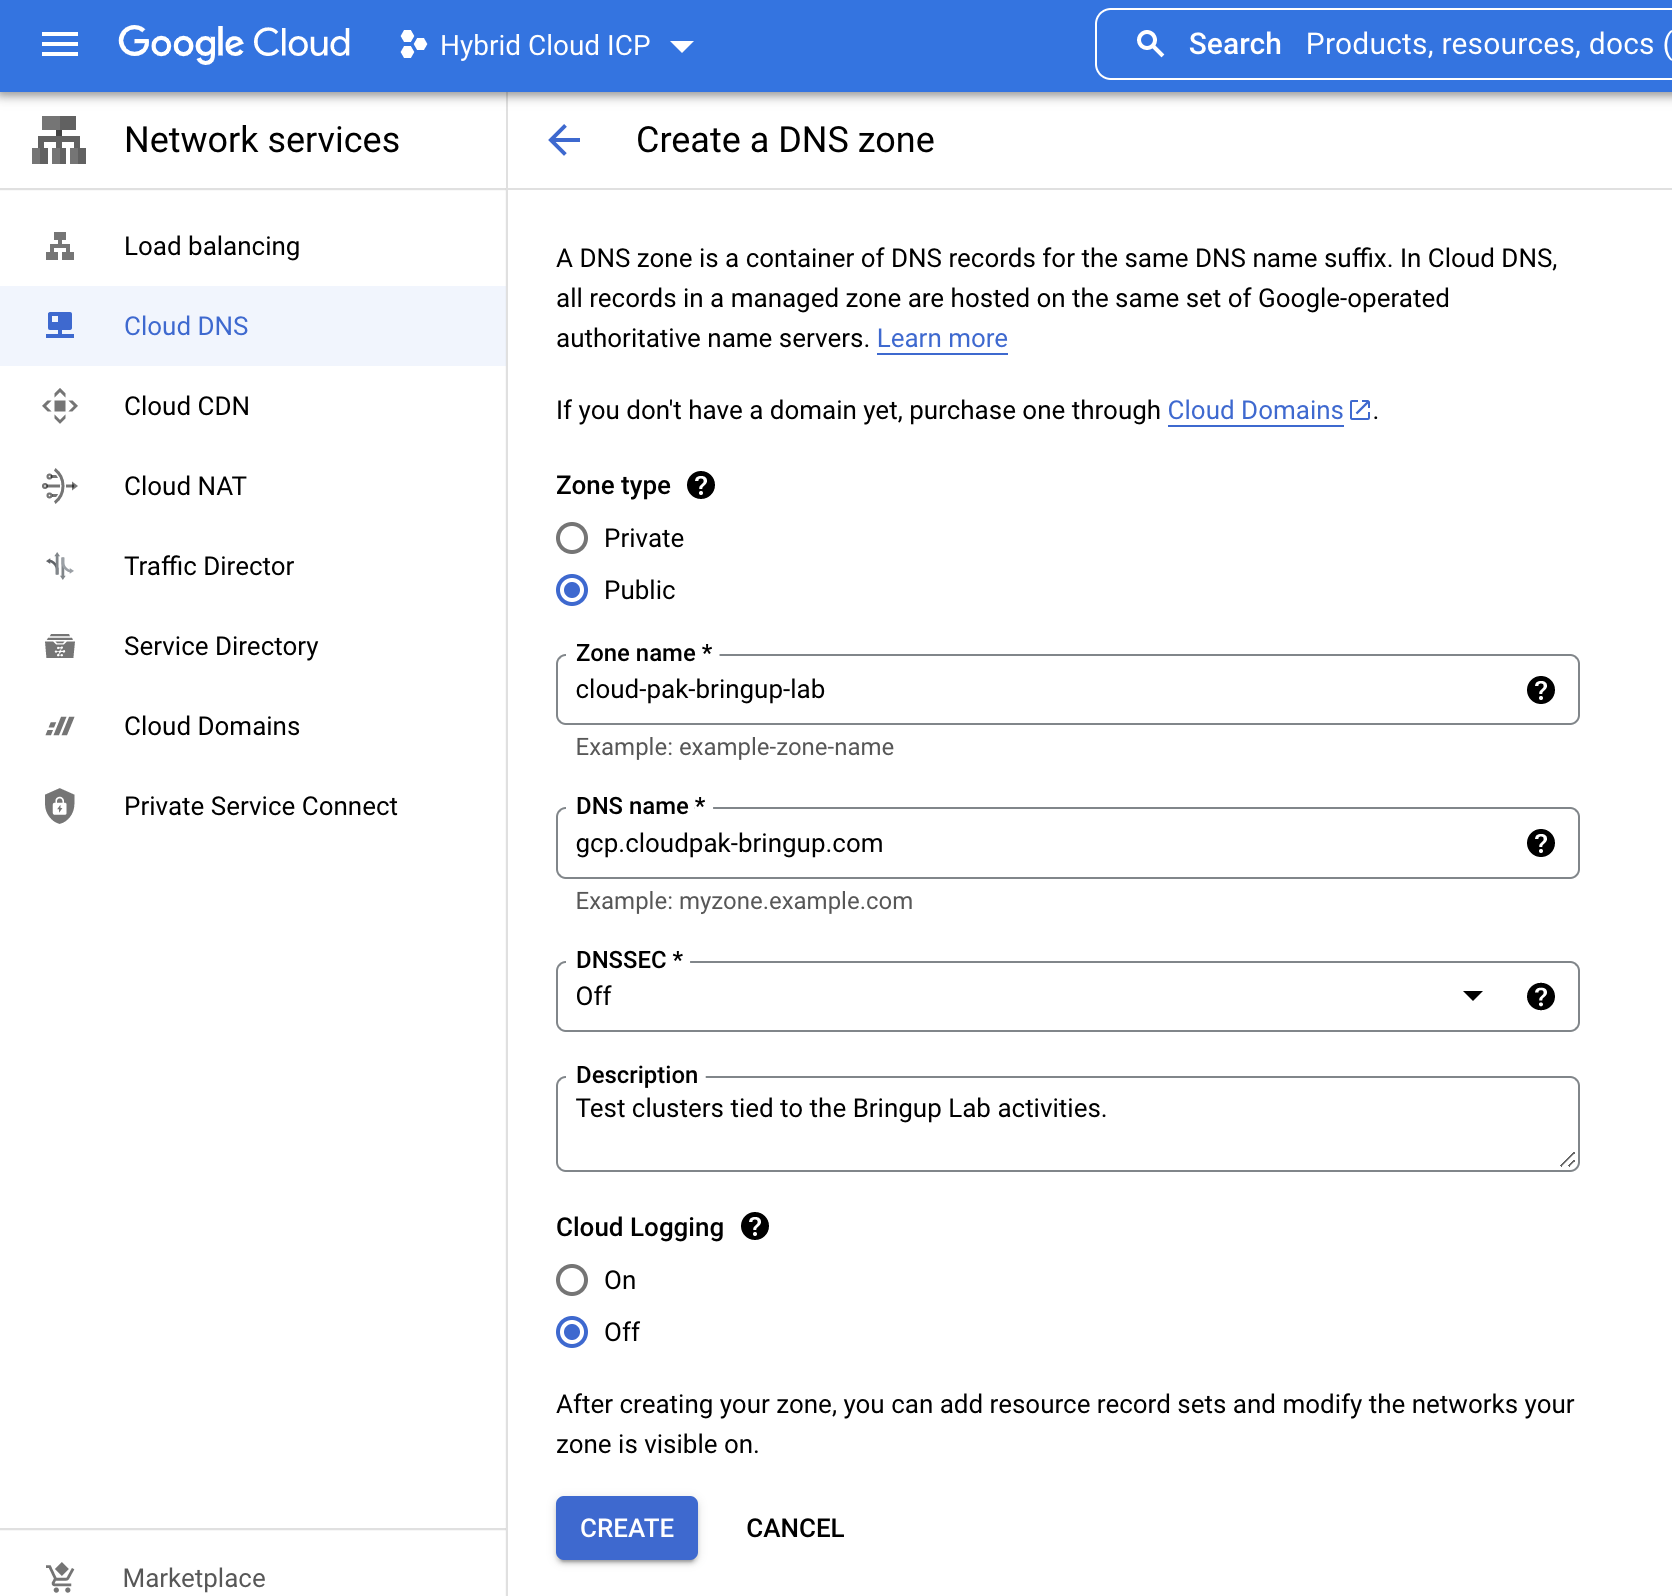 |
|---|
| Creation form for DNS zone |
The following listing shows the alternative command if using the GCP CLI:
project_id=# type your GCP project id here
gcloud dns \
    managed-zones create cloud-pak-bringup-lab \
    --project=${project_id:?} \
    --description= "Test clusters tied to the Bringup Lab activities." \
    --dns-name="gcp.cloudpak-bringup.com." --visibility="public" \
    --dnssec-state= "off"
Once the DNS zone is created, you should see the following screen:
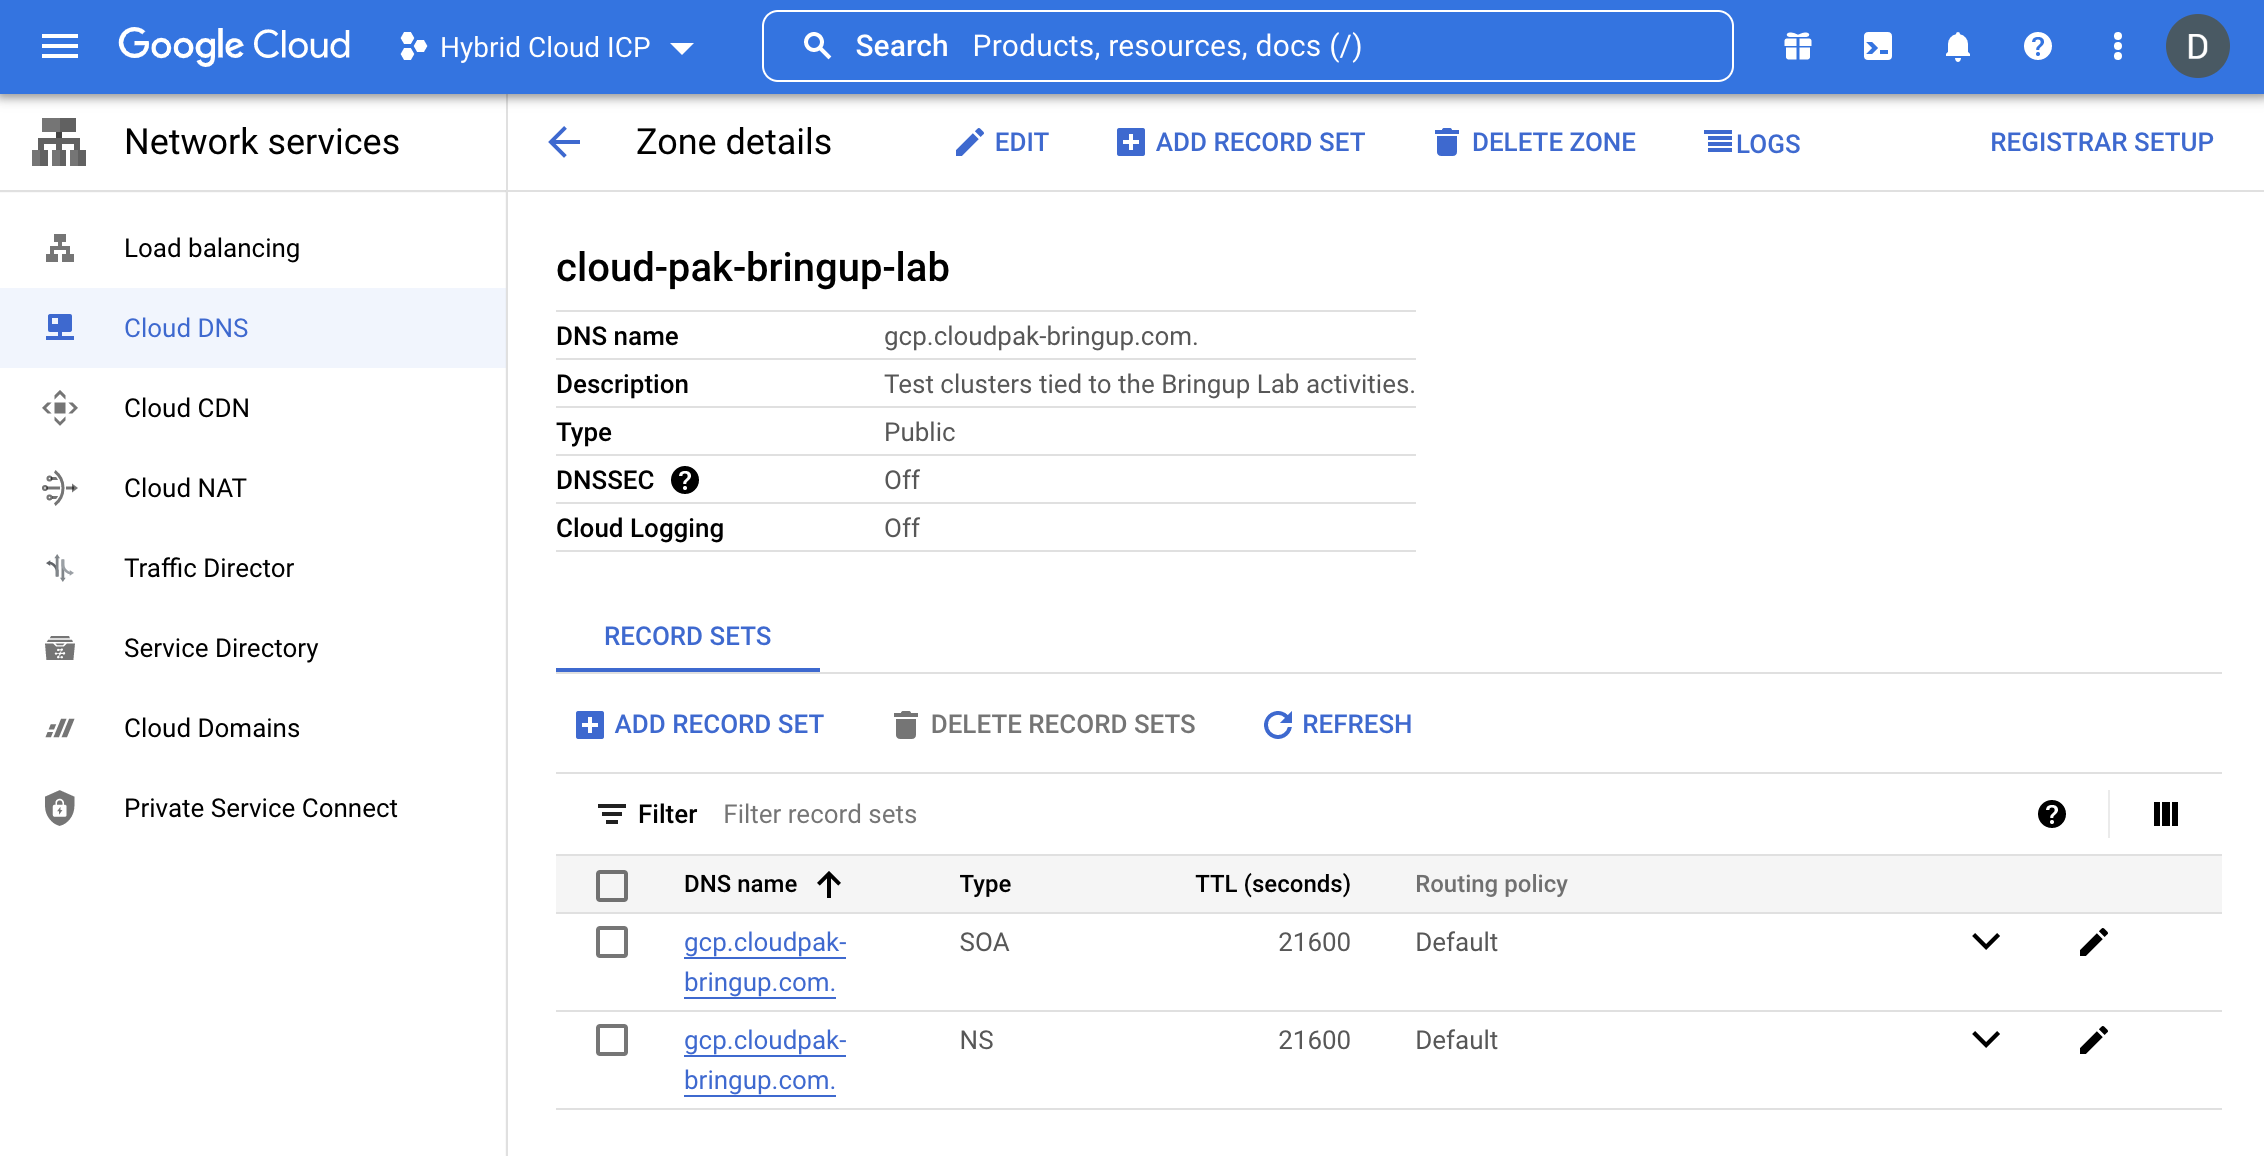 |
|---|
| DNS Zone in GCP Console |
Set aside the list of GCP DNS servers
Click on the “NS” entry named “gcp.cloudpak-bringup.com” to see the resource record set details.
Write down the list of name servers under the “Routing data” table. That list is needed later when configuring the DNS zone in AWS.
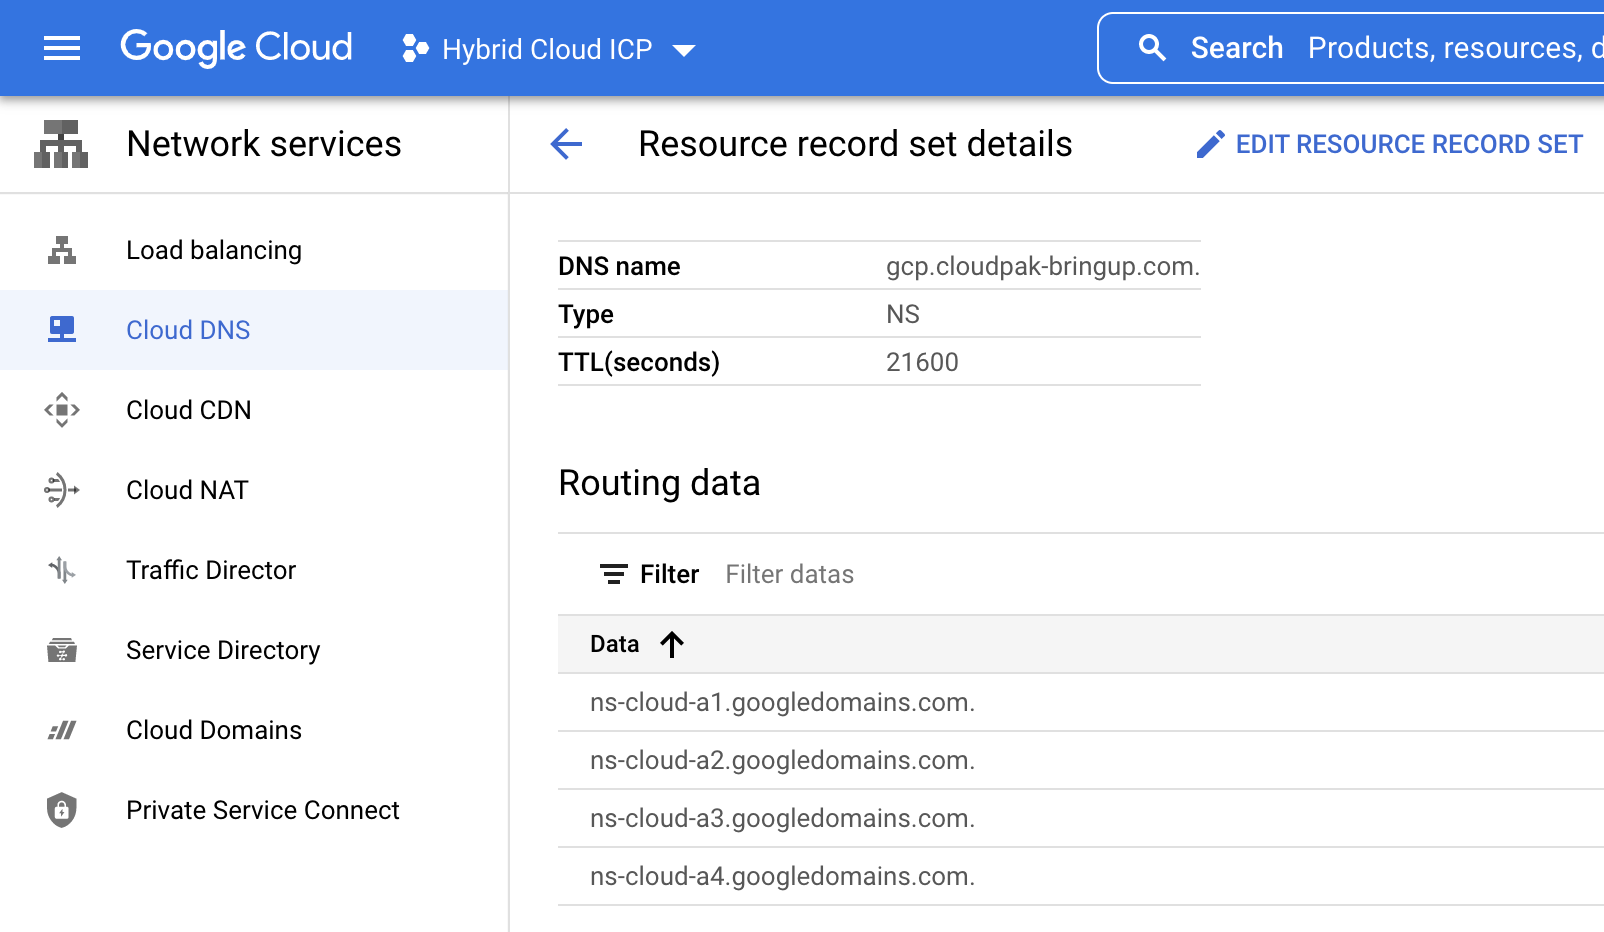 |
|---|
| List of DNS names for the new DNS zone |
The list contains the following records in our example, but your DNS record may have a different list of DNS servers.
ns-cloud-e1.googledomains.com.
ns-cloud-e2.googledomains.com.
ns-cloud-e3.googledomains.com.
ns-cloud-e4.googledomains.com.
Create delegation records in Route 53
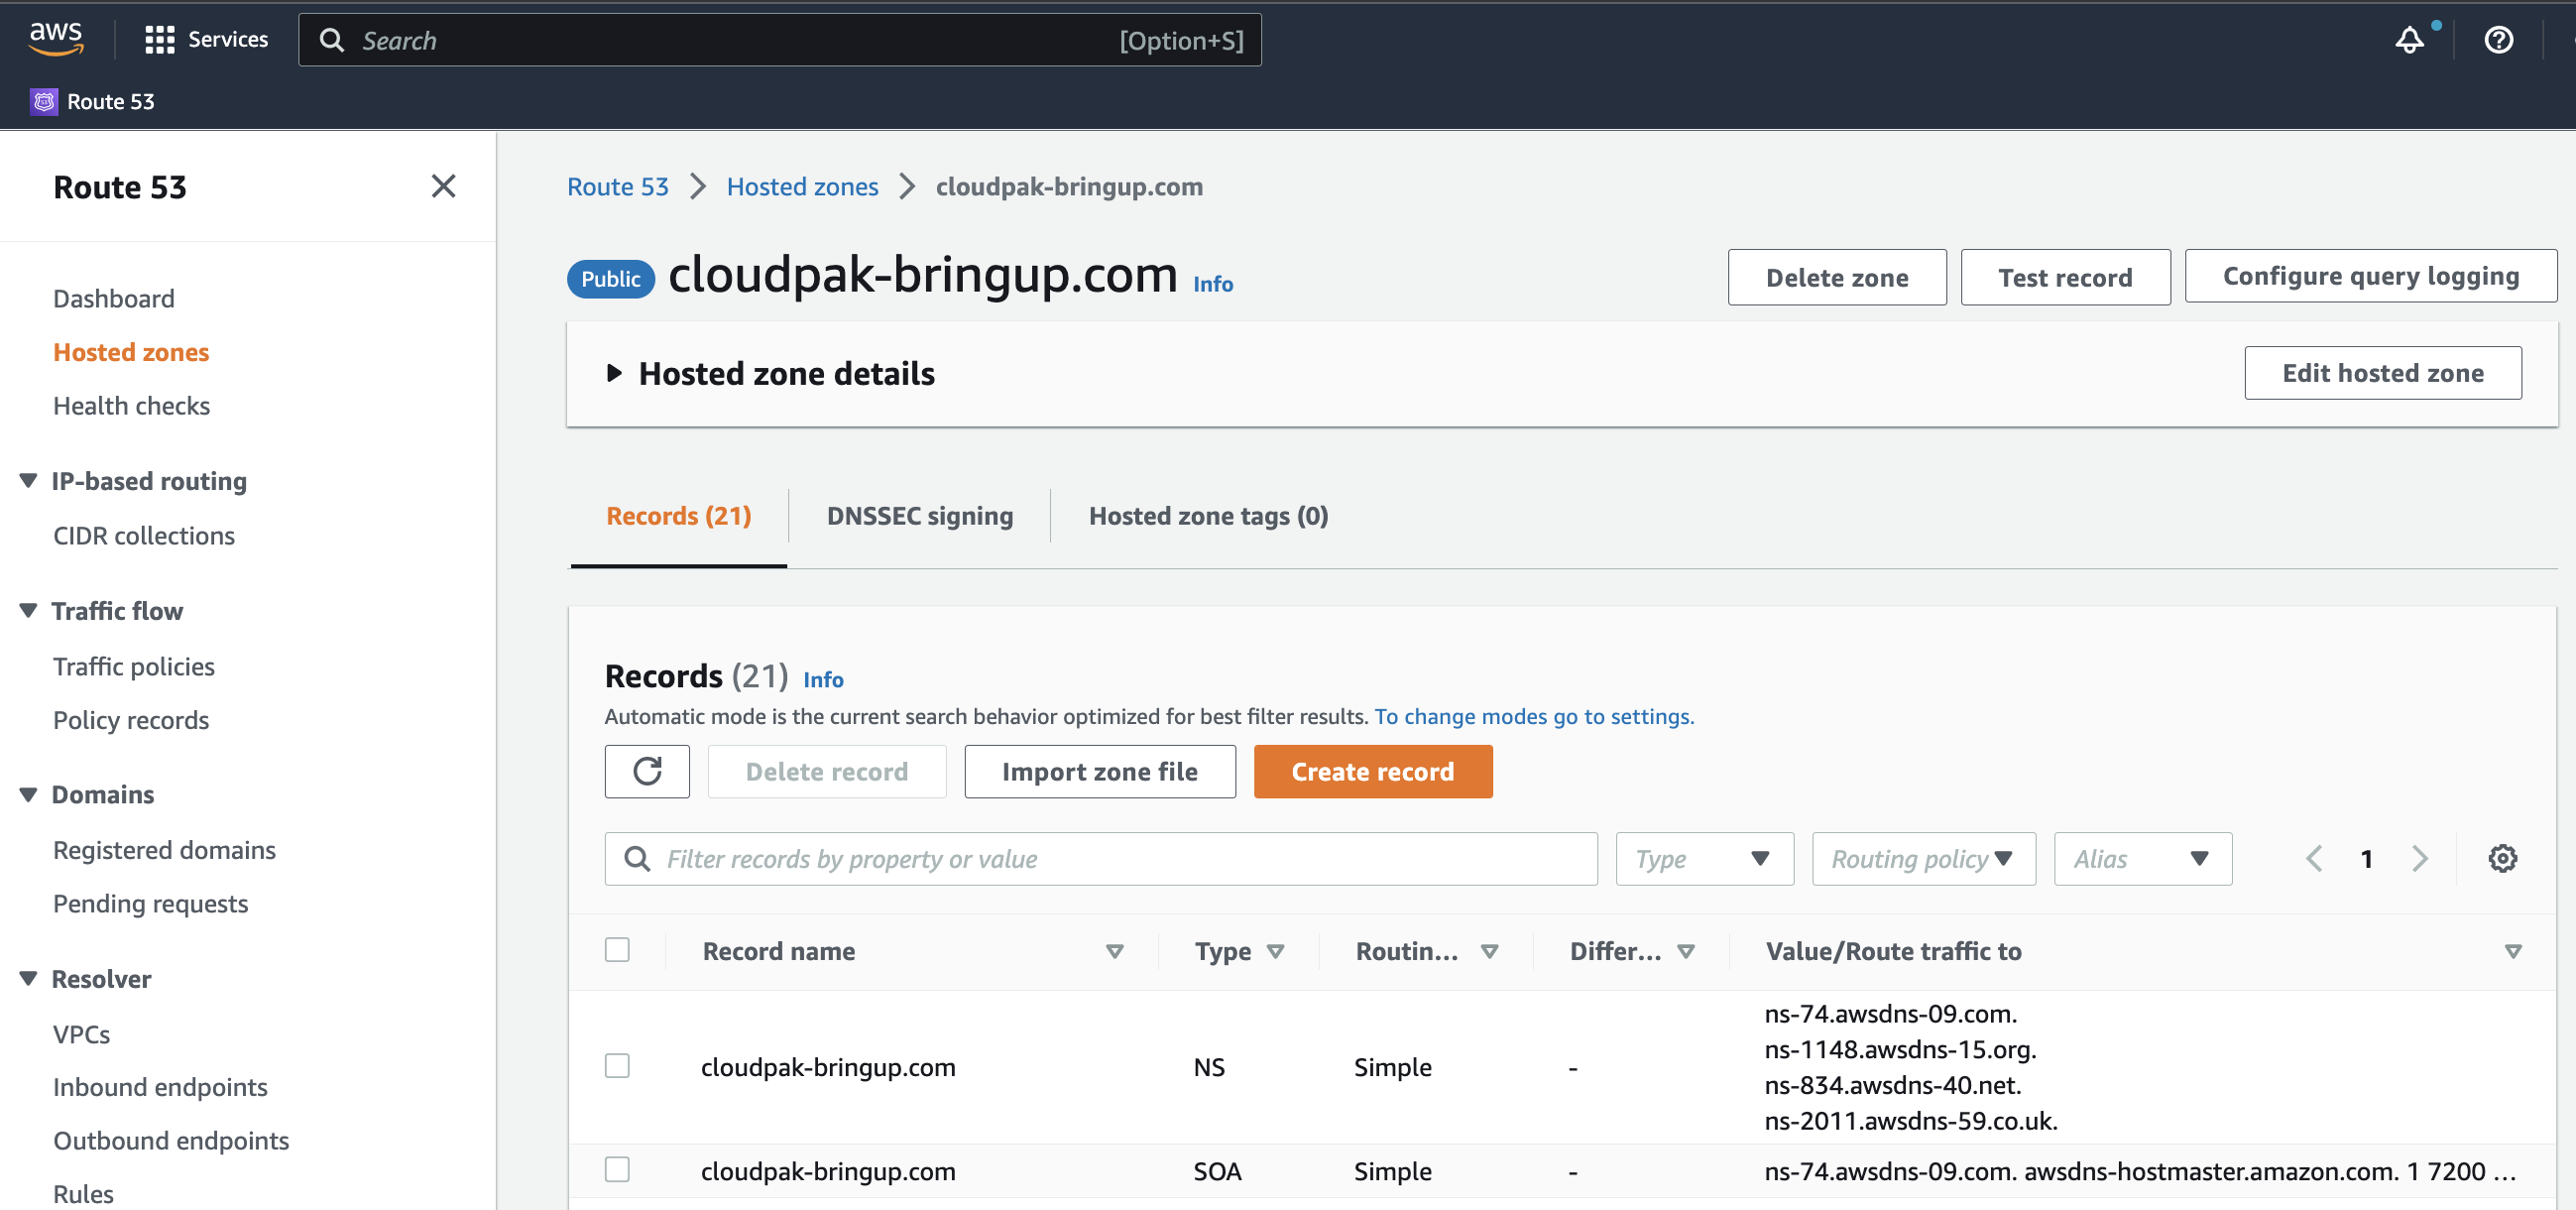
Locate the hosted zone in the Route 53 page of the AWS Console.
 |
|---|
| Authoritative DNS Zone in AWS |
Create Name Server record
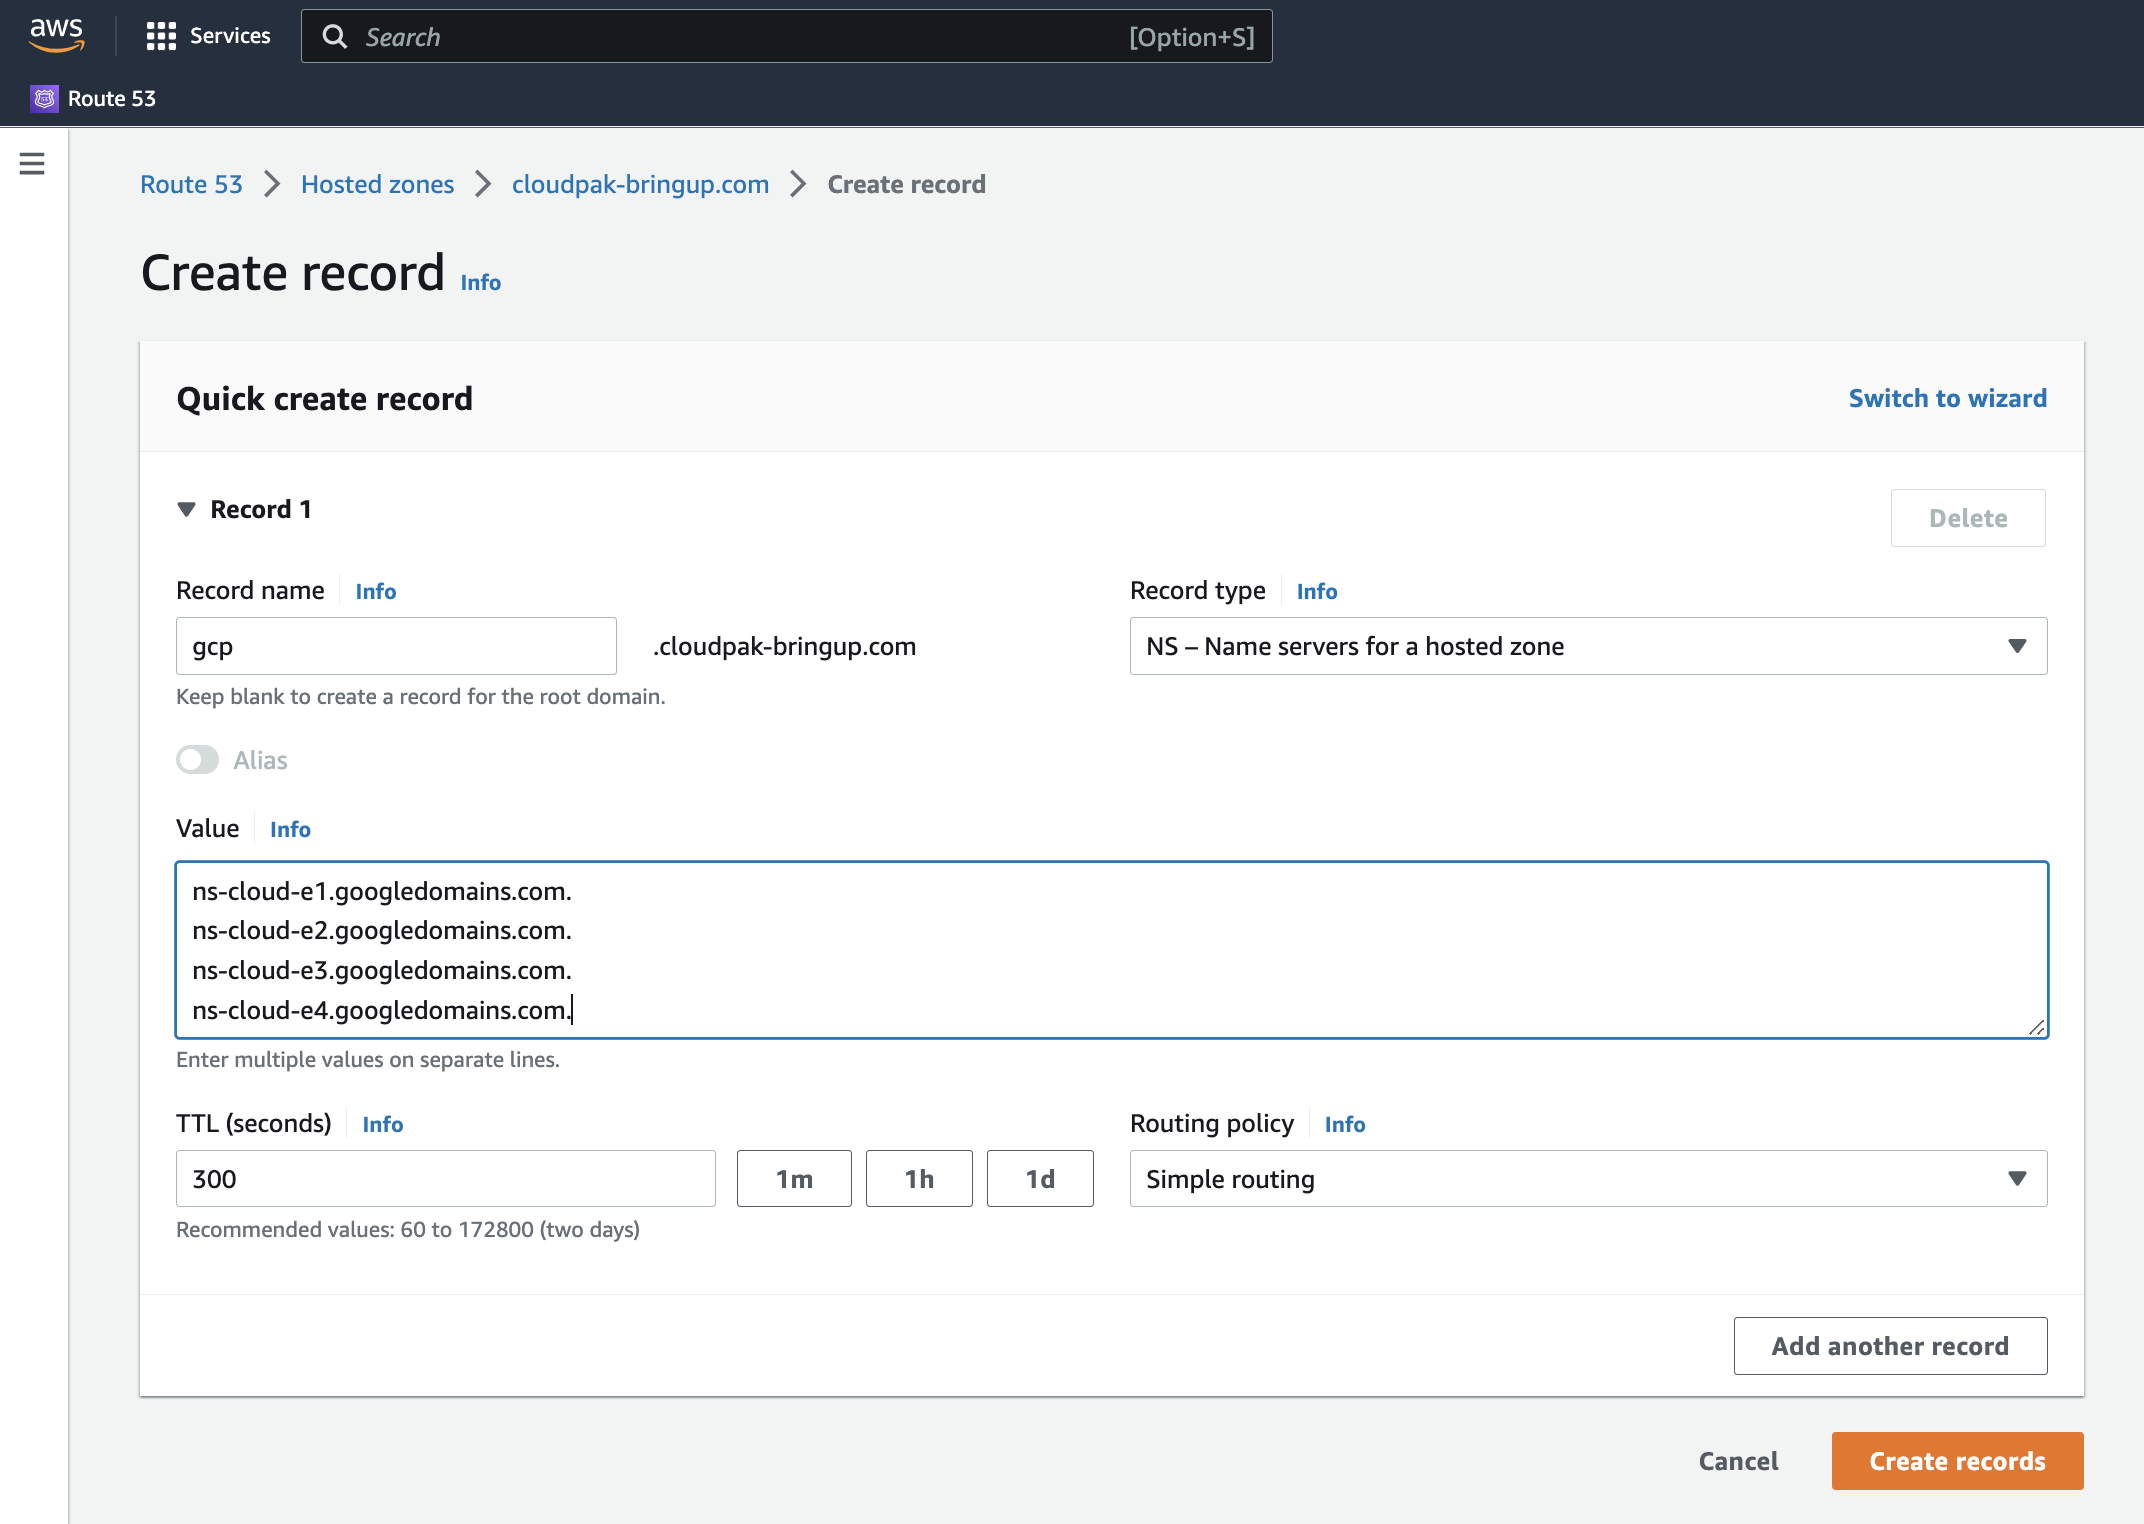
The name server record informs AWS Route 53 to delegate all requests for a sub-domain of the hosted zone to a list of name servers.
In our case, we want to associate the “gcp.cloudpak-bringup.com” sub-domain with the list of name servers obtained from the DNS zone created earlier in GCP.
- Click on “Create Record” and choose the “Simple routing” strategy if prompted for the routing strategy.
- Type
gcpas the record name - Select “NS - Name servers for a hosted zone” as the “Record Type.” Note that this option is grayed out until you fill out the “Record name” field.
- Under “Value,” paste the list of DNS name servers from the GCP DNS zone.
- Click the “Create records” button.
 |
|---|
| Creation of the delegated NS record for the DNS sub-domain in AWS |
(optional) Restrict CAs that can create certificates for the domain
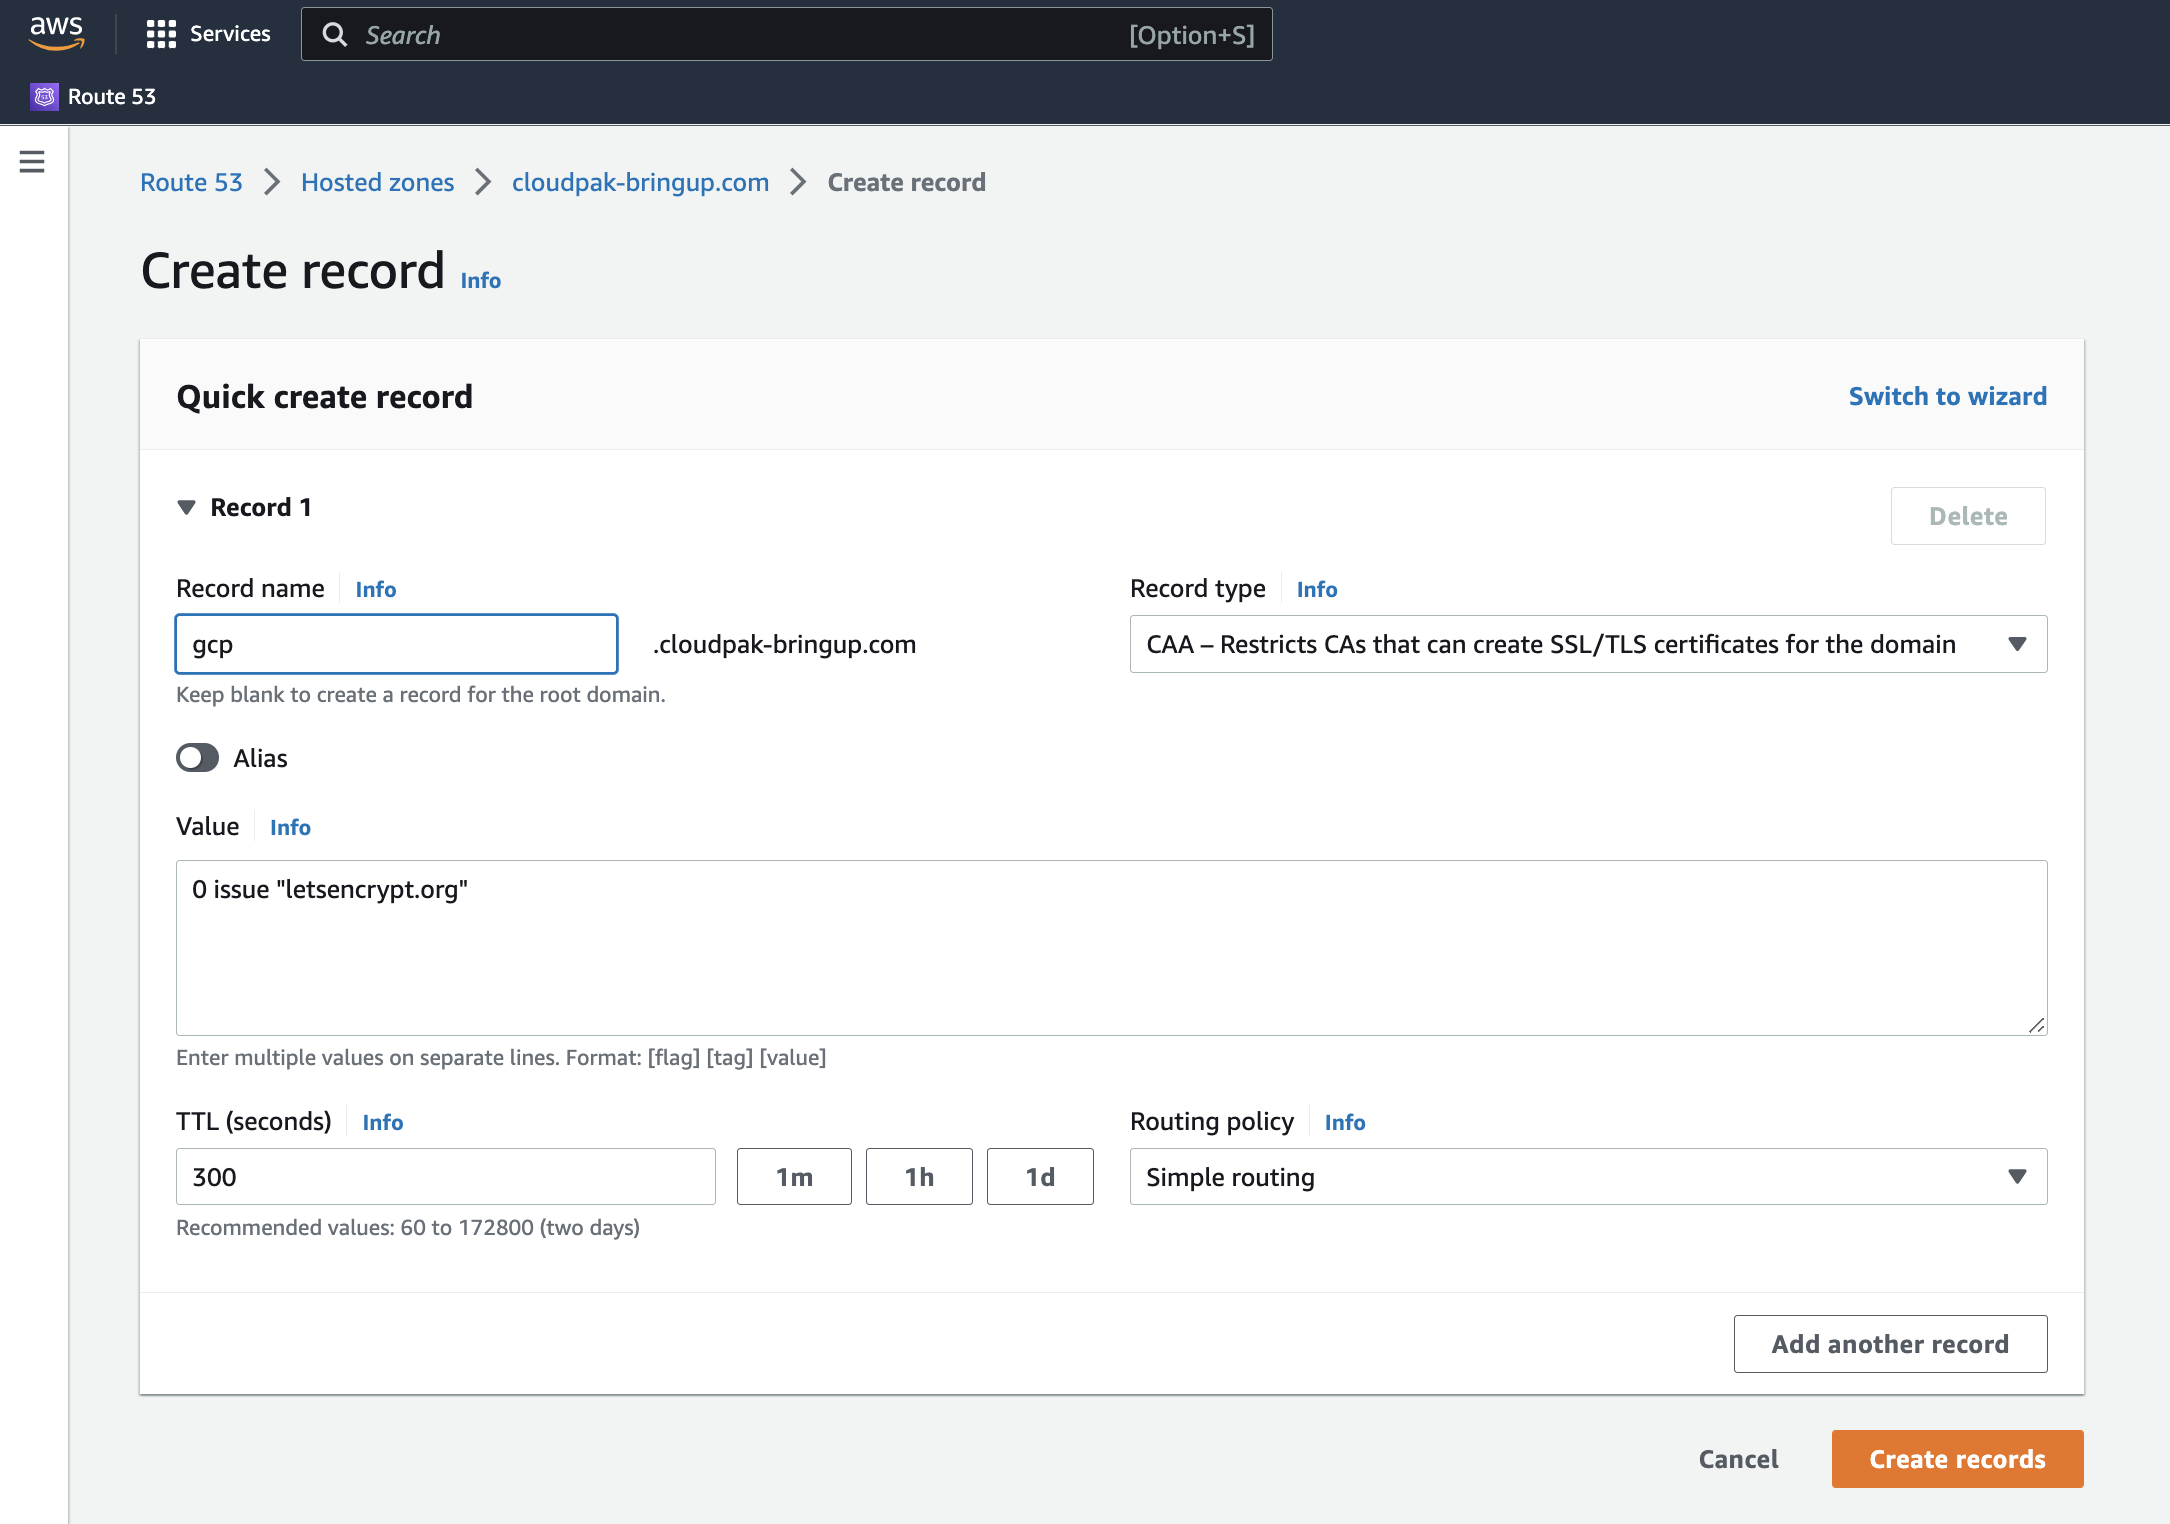
Create an additional record to indicate which CA’s can create certificates for the sub-domain.
- Click on “Create Record” and choose the “Simple routing” strategy if prompted for the routing strategy.
- Use
gcpas the “Record name” field, matching the sub-domain used when creating the DNS zone in GCP. - Pick “CAA – Restricts CAs that can create SSL/TLS certificates for the domain” as the “Record Type.”
- Choose the appropriate issuer value for the CA authority. For example, for “Let’s Encrypt,” use
0 issue "letsencrypt.org" - Keep the other default values.
- Click the “Create records” button.
 |
|---|
| Creation of the CAA record for the DNS sub-domain in AWS |
Validating DNS configuration
Once the DNS records are configured in both cloud providers, it is a good idea to validate the setup before attempting to create the OpenShift cluster (or whatever other service you want to respond to in the new sub-domain.)
Note that some DNS settings typically take a few moments to propagate across the various DNS servers on the Internet.
This example command queries the authority for a pseudo hostname in the new sub-domain:
dig some-non-existent-service.gcp.cloudpak-bringup.com soa +noall +authority
The command results should indicate that GCP is the authority for the sub-domain, like in the following snippet:
; <<>> DiG 9.10.6 <<>> some-non-existent-service.gcp.cloudpak-bringup.com soa +noall +authority
;; global options: +cmd
gcp.cloudpak-bringup.com. 300 IN  SOA ns-cloud-e1.googledomains.com. cloud-dns-hostmaster.google.com. 1 21600 3600 259200 300
Create the OpenShift cluster
With the DNS resolution configured in both clouds, it is time to create the OpenShift cluster in GCP.
There are multiple methods for creating an OpenShift cluster on GCP Cloud. The most basic methods are listed in the OpenShift Container Platform documentation.
There are more sophisticated mechanisms, such as Red Hat Advanced Cluster Management for Kubernetes.
Whatever method you choose, use the new sub-domain as the baseDomain field: gcp.cloudpak-bringup.com.
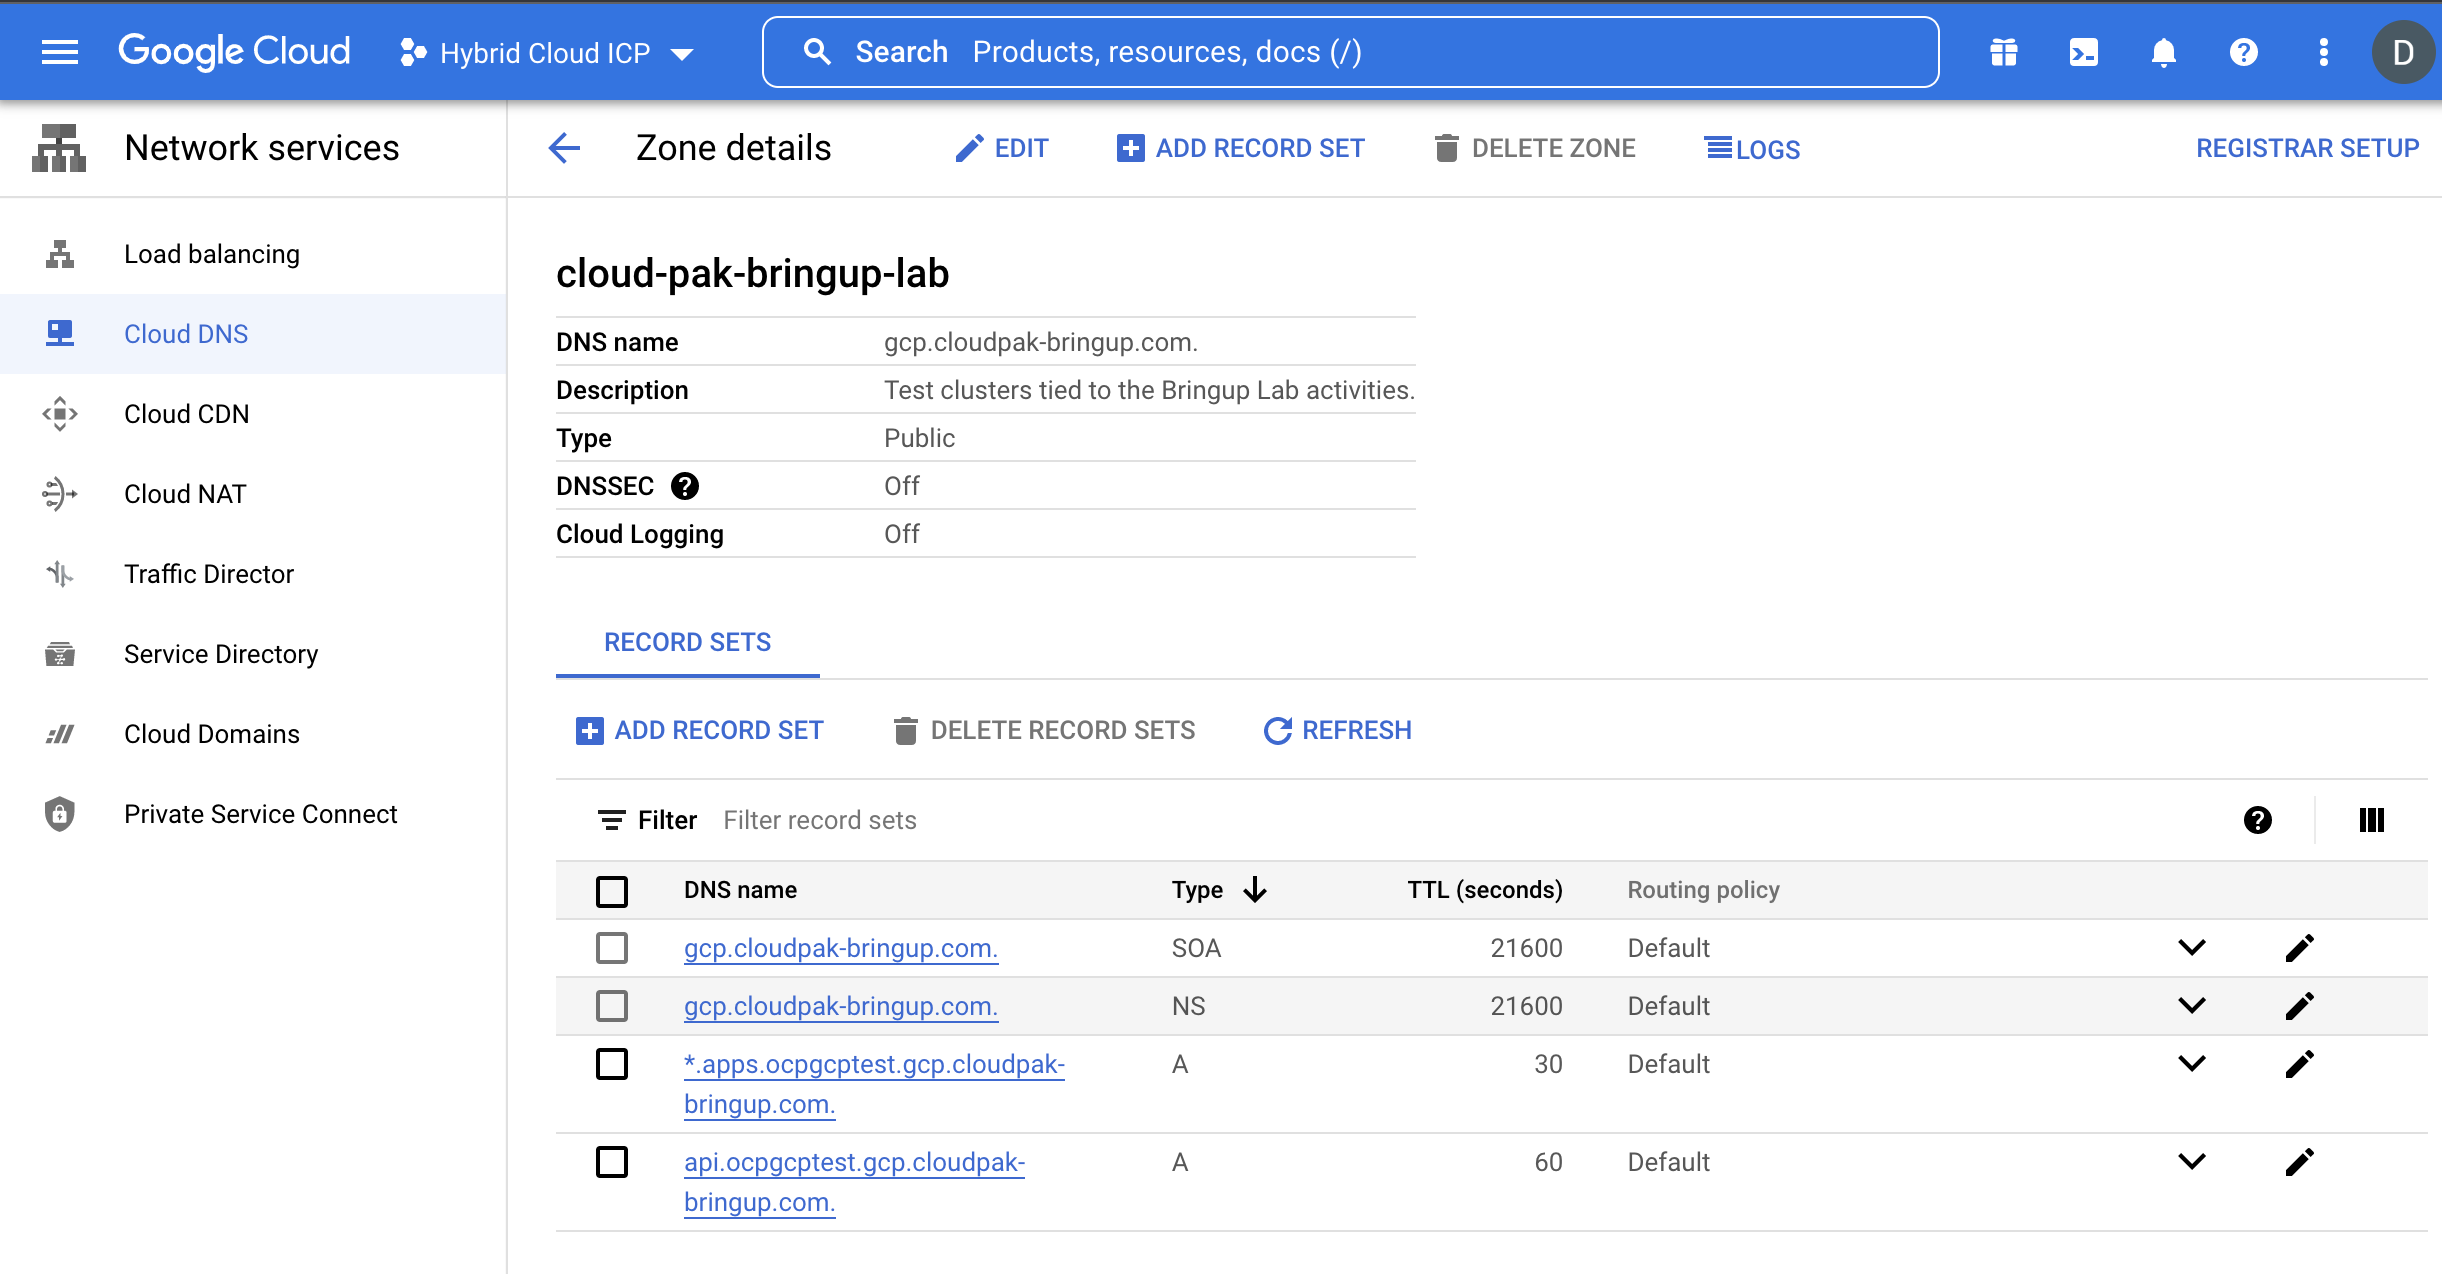
Once the cluster creation completes, you should see two new “A” type DNS records for the OCP endpoints in the GCP console:
- *.apps.clustername.cloudpak-bringup.com
- api.clustername.cloudpak-bringup.com
 |
|---|
| OCP cluster routes for the new cluster |
With those DNS records in place, you can now access the resulting cluster endpoints using their DNS names and not resort to local alterations.
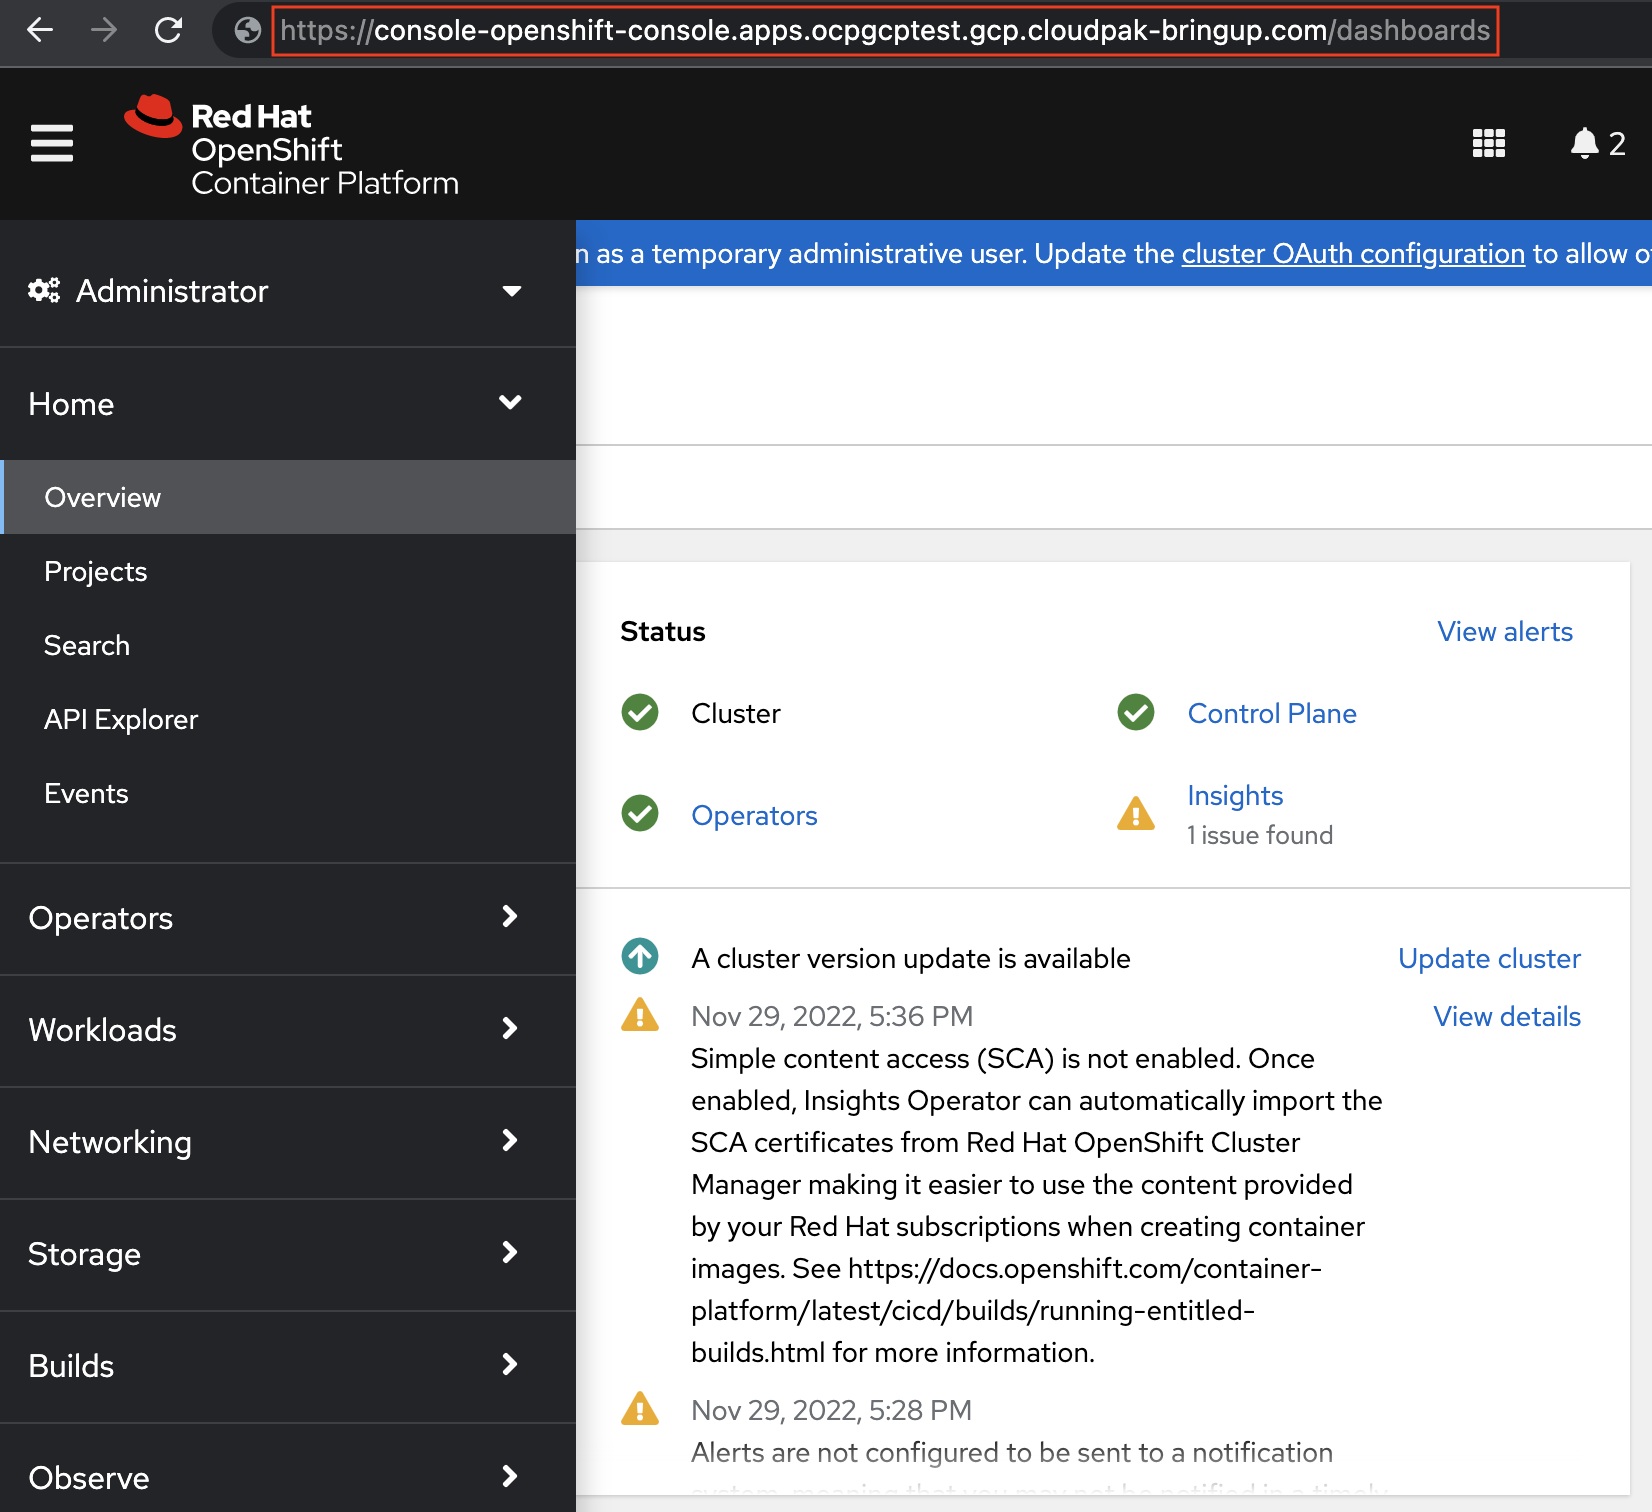 |
|---|
| OCP console hosted in the new DNS sub-domain |
Conclusion
This type of DNS delegation is a common solution for hybrid multi-cloud arrangements where you want to share the primary DNS domain name for all systems spread across the different clouds.
The detailed instructions should be sufficient to generalize the solution to different DNS providers, paying attention to the placement of the appropriate “NS” DNS records in the respective DNS zones.


